实现原理
天空变换是图像分割的一种应用,把图像中的天空与非天空区分割开,结合掩膜将天空更改为其他图像。如何较优地实现天空变换,与识别证件照类似,难点在于两个:
1.天空分割。将图像转为HSV并对S和V通道进行直方图均衡化,再通过设定的HSV三通道阈值选定天空的颜色范围,进而提取天空区域(H为78-124,S为0-255,V为78-255,该参数为我大量测试后凭经验所设,考虑到图像多样性,函数我提供了参数接口以便动态调整);thresh为天空区域的掩膜图,反相后的thresh_为非天空区域掩膜图,接下来识别非天空区的轮廓区域,采用外部轮廓方式,这样能提取出多个轮廓区,保留最大的轮廓区,不出意外这个就是前景区(出意外就自己重写该部分代码来判断真实的前景区);然后闭运算填充轮廓区内部微小孔洞,注意这个参数越大,轮廓越完整,但代价是一些孔洞处没法进行图像更换,所以自己把握参数;进行均值滤波,这一步是为了边缘平滑,为后续新天空和非天空区的融合作铺垫;输出Foreground,该掩膜图255的区域为非天空区。
2.两区域边缘融合。如果不能很好地融合,就能看出明显的抠图痕迹,所以融合是很关键的一步。首先,将新天空图尺寸调整为原图尺寸;其次,对蒙版区(掩膜)进行均值滤波,其边缘区会生成介于0-255之间的缓存区;再通过比例分配的方式对缓存区的像素点上色,我固定的比例为前景0.3天空0.7,可以使得缓存区颜色倾向于天空色,且实现较好地过渡;最后,蒙版为0的区域为新天空图,蒙版为255的区域不变。
至此,完成了天空变换。C++实现代码如下。
功能函数代码
// 天空分离
cv::Mat SkySeparation(cv::Mat src, Inputparama input)
{
  // 异常数值修正
  input.low_h = max(uchar(0), min(uchar(255), input.low_h));
  input.high_h = max(uchar(0), min(uchar(255), input.high_h));
  input.low_s = max(uchar(0), min(uchar(255), input.low_s));
  input.high_s = max(uchar(0), min(uchar(255), input.high_s));
  input.low_v = max(uchar(0), min(uchar(255), input.low_v));
  input.high_v = max(uchar(0), min(uchar(255), input.high_v));
  input.close_size= max(0, min(10, input.close_size));
  input.blur_size = max(0, min(10, input.blur_size));
  // 转为hsv通道
  cv::Mat hsv,nhsv,thresh;
  cvtColor(src, hsv, COLOR_BGR2HSV);
  vector<cv::Mat> hsvs;
  split(hsv, hsvs);
  cv::Mat h,s,v;
  // 直方图均衡化
  equalizeHist(hsvs[1], s);
  equalizeHist(hsvs[2], v);
  hsvs[1] = s.clone();
  hsvs[2] = v.clone();
  merge(hsvs, nhsv);
  // 按天空色选出mask并反相
  cv::Mat low=(cv::Mat_<uchar>{ input.low_h, input.low_s, input.low_v });
  cv::Mat high = (cv::Mat_<uchar>{ input.high_h, input.high_s, input.high_v  });
  inRange(nhsv, low, high, thresh);
  cv::Mat thresh_ = 255 - thresh;
  // 寻找轮廓,找出最大轮廓作为前景图
  vector<vector<Point>> contour;// , ncontour;
  vector<Vec4i> hierarchy;
  findContours(thresh_, contour, hierarchy, RETR_EXTERNAL, CHAIN_APPROX_NONE);
  cv::Mat Foreground=thresh_.clone();
  if (!contour.empty() && !hierarchy.empty())
  {
    int max = 0;
    std::vector<std::vector<cv::Point> >::const_iterator itc = contour.begin();
    std::vector<std::vector<cv::Point> >::const_iterator itmax;
    // 遍历所有轮廓
    int i = 1;
    while (itc != contour.end())
    {
      double area = cv::contourArea(*itc);
      if (area > max)
      {
        itmax = itc;
        max = area;
      }
      itc++;
    }
    for (auto it = contour.begin(); it != contour.end(); it++)
    {
      if (it!=itmax)
      {
        cv::Rect rect = cv::boundingRect(cv::Mat(*it));
        for (int i = rect.y; i < rect.y + rect.height; i++)
        {
          uchar *output_data = Foreground.ptr<uchar>(i);
          for (int j = rect.x; j < rect.x + rect.width; j++)
          {
            // 将连通区的值置0
            if (output_data[j] == 255)
            {
              output_data[j] = 0;
            }
          }
        }
      }
    }
  }
  // 闭运算
  cv::Mat element = getStructuringElement(MORPH_ELLIPSE, Size(2*input.close_size+1, 2 * input.close_size + 1));
  cv::morphologyEx(Foreground, Foreground, MORPH_CLOSE, element);
  // 滤波
  cv::blur(Foreground, Foreground, Size(2 * input.blur_size + 1, 2 * input.blur_size + 1));
  return Foreground;
}
C++测试代码
#include <iostream>
#include <opencv2/opencv.hpp>
#include <time.h>
using namespace std;
using namespace cv;
// 输入参数
struct Inputparama {
  uchar low_h = 78;                     // 识别天空区域hsv颜色的最底H值
  uchar high_h = 124;                   // 识别天空区域hsv颜色的最高H值
  uchar low_s = 0;                      // 识别天空区域hsv颜色的最底S值
  uchar high_s = 255;                   // 识别天空区域hsv颜色的最高S值
  uchar low_v = 78;                     // 识别天空区域hsv颜色的最底V值
  uchar high_v = 255;                   // 识别天空区域hsv颜色的最高V值
  int close_size = 4;                 // 非天空区域闭运算尺寸,该值越大则区域越完整,代价是一些孔洞处没法进行图像更换
  int blur_size = 2;                  // 非天空区域滤波窗口尺寸,该值越大则天空与非天空区衔接处越模糊,适当的数值可以带来较优的融合效果
};
cv::Mat SkySeparation(cv::Mat src, Inputparama input);
cv::Mat ImageFusion(cv::Mat src1, cv::Mat src2, cv::Mat mask);
int main()
{
  cv::Mat src = imread("test3.jpg");
  cv::Mat sky = imread("sky5.jpg");
  Inputparama input;
  input.low_h = 78;
  input.high_h = 124;
  input.low_s = 0;
  input.high_s = 255;
  input.low_v = 78;
  input.high_v = 255;
  input.close_size = 4;
  input.blur_size = 2;
  clock_t s, e;
  s = clock();
  cv::Mat thresh = SkySeparation(src,input);
  cv::Mat result = ImageFusion(src, sky, thresh);
  e = clock();
  double dif = (e - s) / CLOCKS_PER_SEC;
  cout << "time:" << dif << endl;
  imshow("original", src);
  imshow("result", result);
  waitKey(0);
  return 0;
}
// 天空分离
cv::Mat SkySeparation(cv::Mat src, Inputparama input)
{
  // 异常数值修正
  input.low_h = max(uchar(0), min(uchar(255), input.low_h));
  input.high_h = max(uchar(0), min(uchar(255), input.high_h));
  input.low_s = max(uchar(0), min(uchar(255), input.low_s));
  input.high_s = max(uchar(0), min(uchar(255), input.high_s));
  input.low_v = max(uchar(0), min(uchar(255), input.low_v));
  input.high_v = max(uchar(0), min(uchar(255), input.high_v));
  input.close_size= max(0, min(10, input.close_size));
  input.blur_size = max(0, min(10, input.blur_size));
  // 转为hsv通道
  cv::Mat hsv,nhsv,thresh;
  cvtColor(src, hsv, COLOR_BGR2HSV);
  vector<cv::Mat> hsvs;
  split(hsv, hsvs);
  cv::Mat h,s,v;
  // 直方图均衡化
  equalizeHist(hsvs[1], s);
  equalizeHist(hsvs[2], v);
  hsvs[1] = s.clone();
  hsvs[2] = v.clone();
  merge(hsvs, nhsv);
  // 按天空色选出mask并反相
  cv::Mat low=(cv::Mat_<uchar>{ input.low_h, input.low_s, input.low_v });
  cv::Mat high = (cv::Mat_<uchar>{ input.high_h, input.high_s, input.high_v  });
  inRange(nhsv, low, high, thresh);
  cv::Mat thresh_ = 255 - thresh;
  // 寻找轮廓,找出最大轮廓作为前景图
  vector<vector<Point>> contour;// , ncontour;
  vector<Vec4i> hierarchy;
  findContours(thresh_, contour, hierarchy, RETR_EXTERNAL, CHAIN_APPROX_NONE);
  cv::Mat Foreground=thresh_.clone();
  if (!contour.empty() && !hierarchy.empty())
  {
    int max = 0;
    std::vector<std::vector<cv::Point> >::const_iterator itc = contour.begin();
    std::vector<std::vector<cv::Point> >::const_iterator itmax;
    // 遍历所有轮廓
    int i = 1;
    while (itc != contour.end())
    {
      double area = cv::contourArea(*itc);
      if (area > max)
      {
        itmax = itc;
        max = area;
      }
      itc++;
    }
    for (auto it = contour.begin(); it != contour.end(); it++)
    {
      if (it!=itmax)
      {
        cv::Rect rect = cv::boundingRect(cv::Mat(*it));
        for (int i = rect.y; i < rect.y + rect.height; i++)
        {
          uchar *output_data = Foreground.ptr<uchar>(i);
          for (int j = rect.x; j < rect.x + rect.width; j++)
          {
            // 将连通区的值置0
            if (output_data[j] == 255)
            {
              output_data[j] = 0;
            }
          }
        }
      }
    }
  }
  // 闭运算
  cv::Mat element = getStructuringElement(MORPH_ELLIPSE, Size(2*input.close_size+1, 2 * input.close_size + 1));
  cv::morphologyEx(Foreground, Foreground, MORPH_CLOSE, element);
  // 滤波
  cv::blur(Foreground, Foreground, Size(2 * input.blur_size + 1, 2 * input.blur_size + 1));
  return Foreground;
}
// 前景背景融合
cv::Mat ImageFusion(cv::Mat src1, cv::Mat src2, cv::Mat mask)
{
  cv::Mat sky;
  resize(src2, sky, Size(src1.cols, src1.rows));
  cv::Mat result = src1.clone();
  int row = src1.rows;
  int col = src1.cols;
  // 改色
  for (int i = 0; i < row; ++i)
  {
    uchar *s1 = result.ptr<uchar>(i);
    uchar *s2 = sky.ptr<uchar>(i);
    uchar *m = mask.ptr<uchar>(i);
    for (int j = 0; j < col; ++j)
    {
      // 蒙版为0的区域就是标准背景区
      if (m[j] == 0)
      {
        s1[3 * j] = s2[3 * j];
        s1[3 * j + 1] = s2[3 * j + 1];
        s1[3 * j + 2] = s2[3 * j + 2];
      }
      // 不为0且不为255的区域是轮廓区域(边缘区),需要虚化处理
      else if (m[j] != 255)
      {
        // 边缘处按比例上色
        int newb = (s1[3 * j] * m[j] * 0.3 + s2[3 * j] * (255 - m[j])*0.7) / ((255 - m[j])*0.7 + m[j] * 0.3);
        int newg = (s1[3 * j + 1] * m[j] * 0.3 + s2[3 * j + 1] * (255 - m[j])*0.7) / ((255 - m[j])*0.7 + m[j] * 0.3);
        int newr = (s1[3 * j + 2] * m[j] * 0.3 + s2[3 * j + 2] * (255 - m[j])*0.7) / ((255 - m[j])*0.7 + m[j] * 0.3);
        newb = max(0, min(255, newb));
        newg = max(0, min(255, newg));
        newr = max(0, min(255, newr));
        s1[3 * j] = newb;
        s1[3 * j + 1] = newg;
        s1[3 * j + 2] = newr;
      }
    }
  }
  return result;
}
测试效果
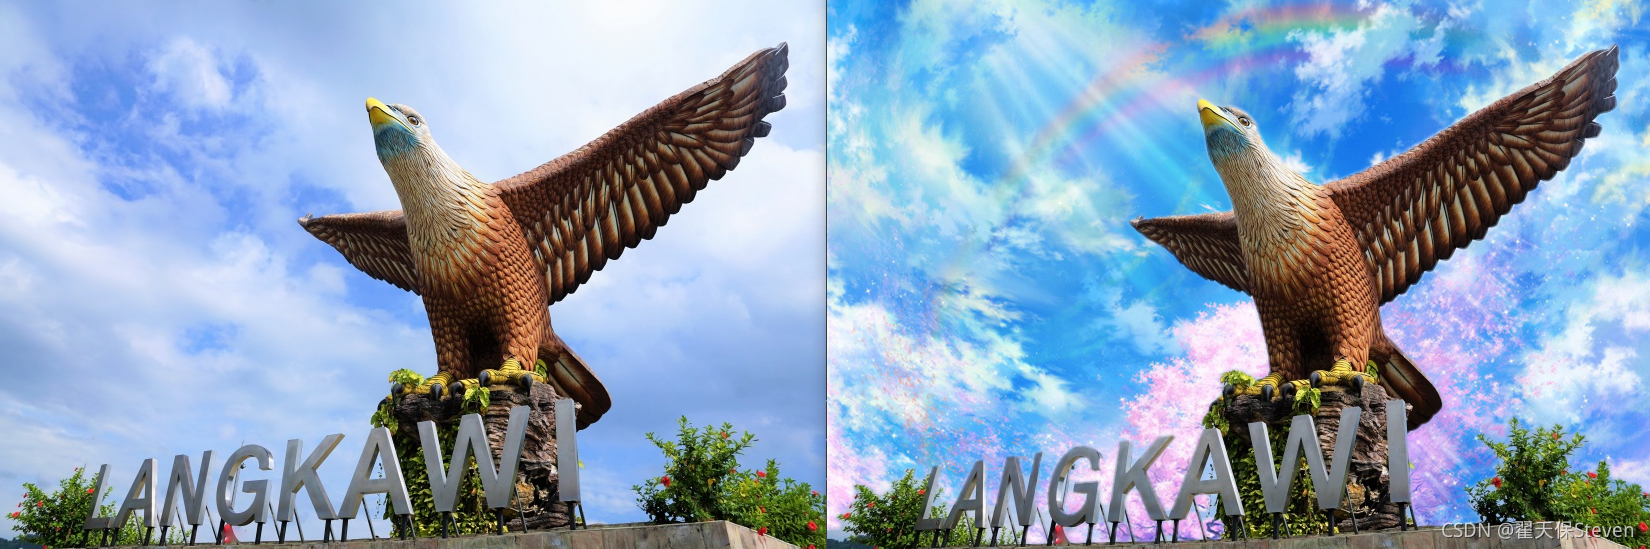 图1 对比图1
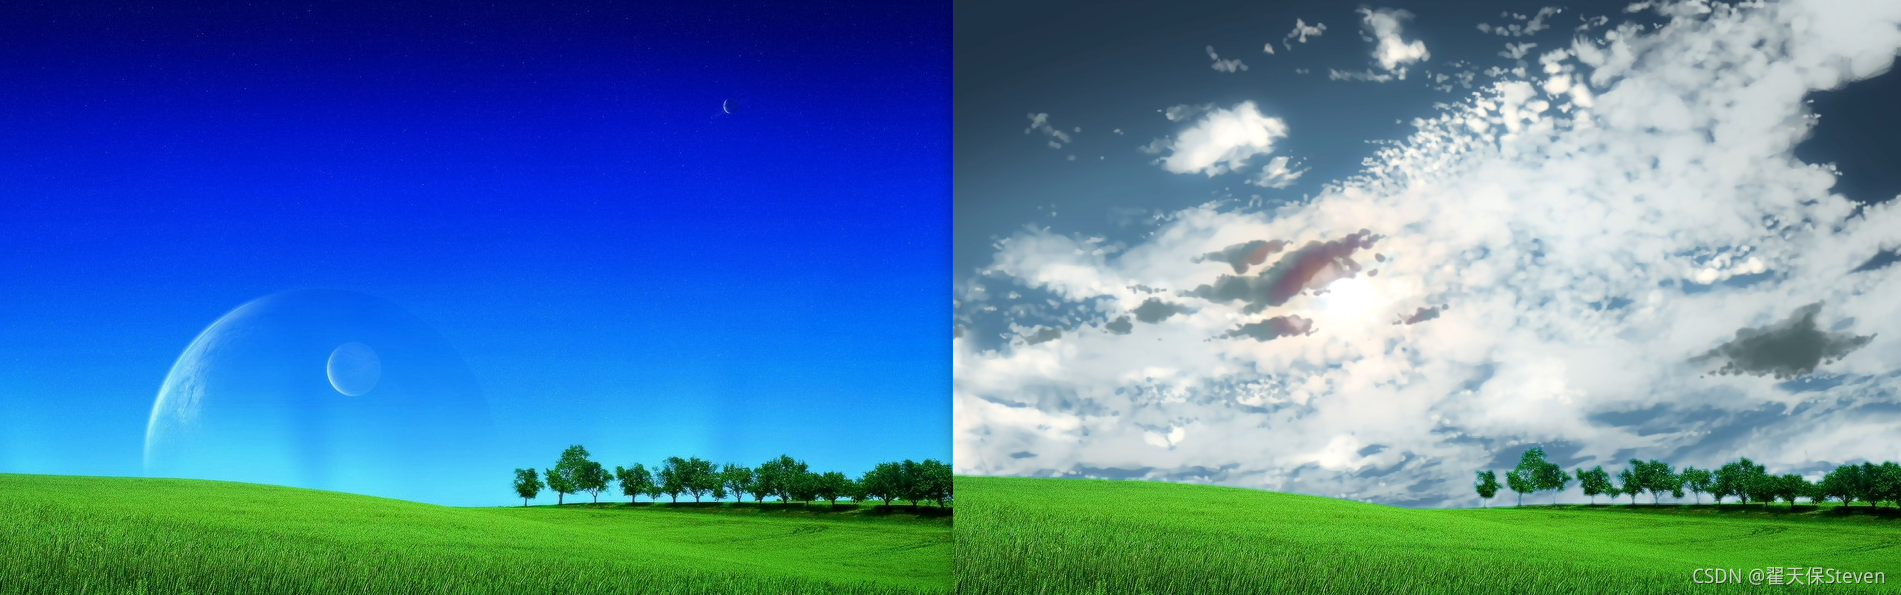 图2 对比图2
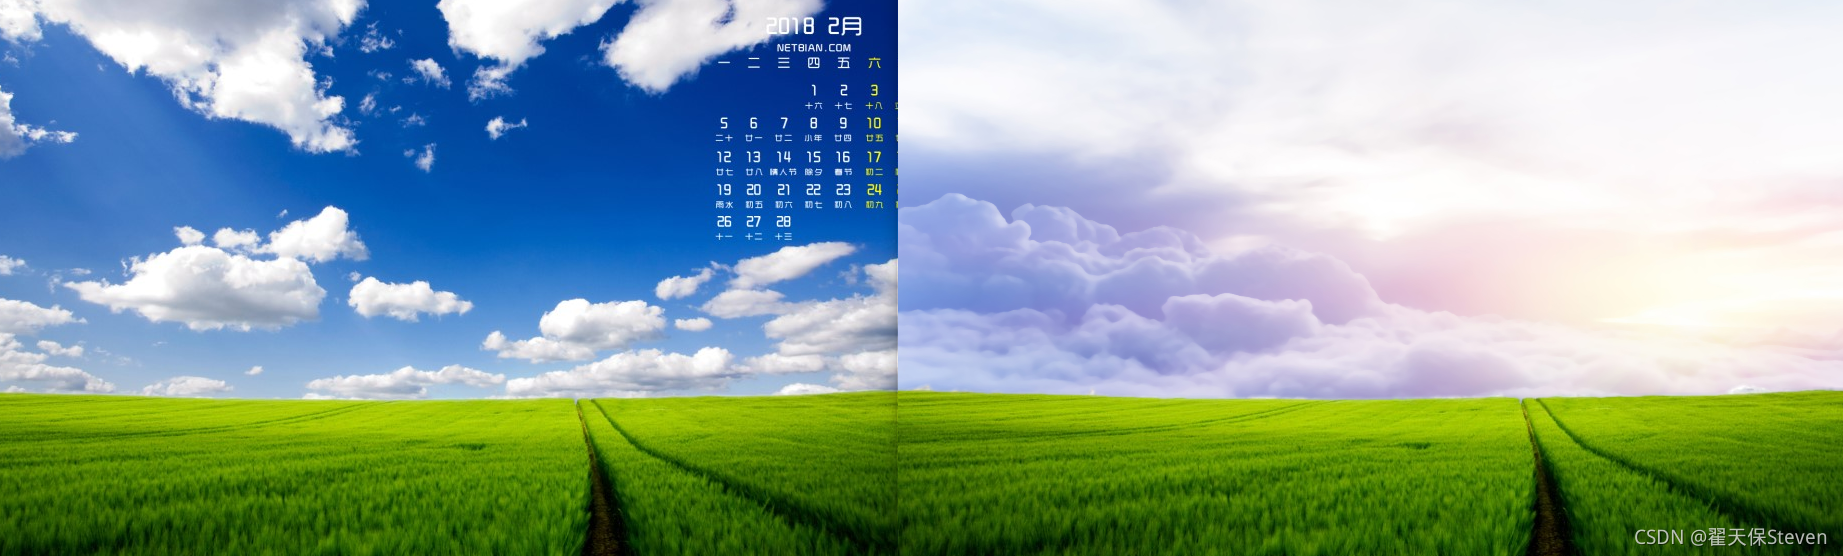
图3 对比图3
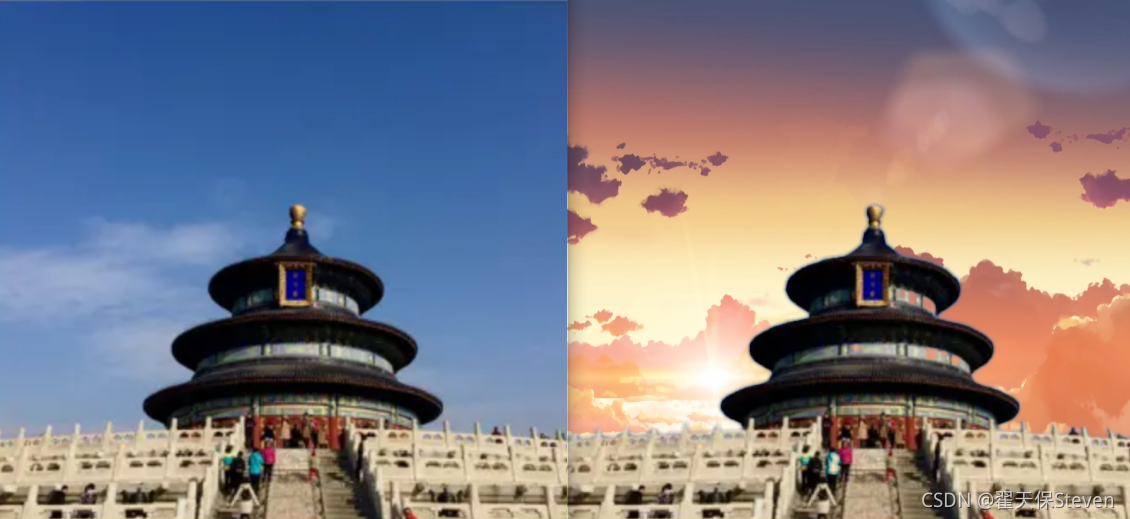 图4 对比图4
如源码所示,函数输入参数共有5项,其说明如下:
- 前6个参数分别为hsv三通道的最大最小值。
- close_size为闭运算尺寸,如果处理的图像中有小树林,建议尺寸调小,不然小树林间的缝隙就是原图,有点不协调。
- blur_size为滤波窗口尺寸,平滑天空与非天空区衔接处。
总的来说,图像如果有明显天空背景,基本都能成功;天空白色区域过多可能识别不准,因为白色的hsv值和蓝色差太多;天空下面有大片海水,也不太行,就识别出来不符合现实逻辑。
源码只有100多行,看懂原理最重要,比直接调用api更能学到知识。永远记住,“代码是死的,场景是多变的,而人是活的。”,针对不同场景,合理改写代码,才能产出最适合你的代码。
如果函数有什么可以改进完善的地方,非常欢迎大家指出,一同进步何乐而不为呢~
如果文章帮助到你了,可以点个赞让我知道,我会很快乐~加油!
